Security questions are beneficial when it comes to resetting the password of your Windows 10 account. But if you already memorized your username and password, and/or you wrote your login details on a piece of paper, you may be tempted to disable the security questions.
If you really want to do that, we’ll guide you through the process. Before we dive in, keep in mind that, without these security settings, recovering your password is going to be quite difficult.
Steps to Disable Security Settings on Windows 10
If You Recently Installed Windows 10
During the Out of Box Experience, you’re asked to set up your account. Instead of adding a password for your account during the setup, choose to do that later.
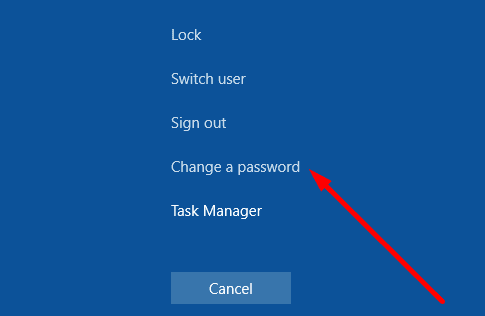
Then, after you completed the install process, press and hold the CTRL + ALT + DEL keys; there will be a list of options available on the screen. Go ahead and select Change a password.
You can now set up a password to protect your account. But you won’t be asked to add any security questions this time around.
If You Already Set up Your Security Questions
Windows 10 users are no longer allowed to change the security questions from Settings. That’s why we’re going to use the Registry Editor.
- Type regedit in the Windows search bar.
- Double-click on the Registry Editor.
- Then, locate the following folder:
- HKEY_LOCAL_MACHINE\SOFTWARE\Policies\Microsoft\Windows\System
- Right-click on System to open the context menu.
- Select New → DWORD Value to create a new key.
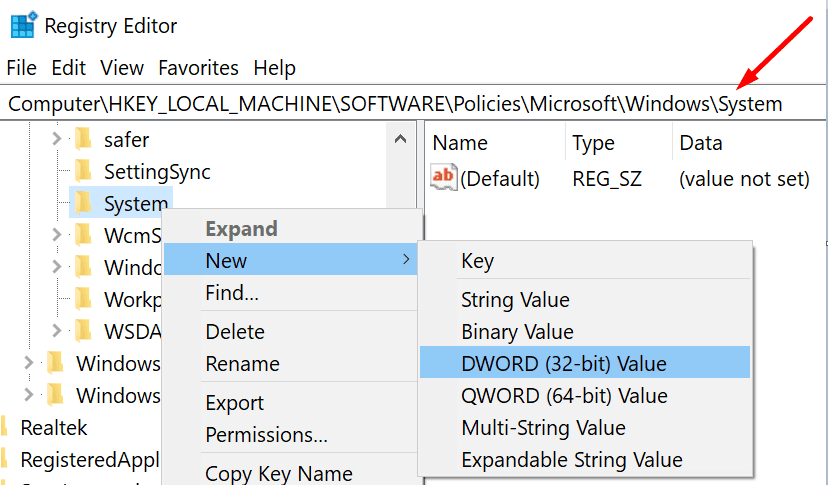
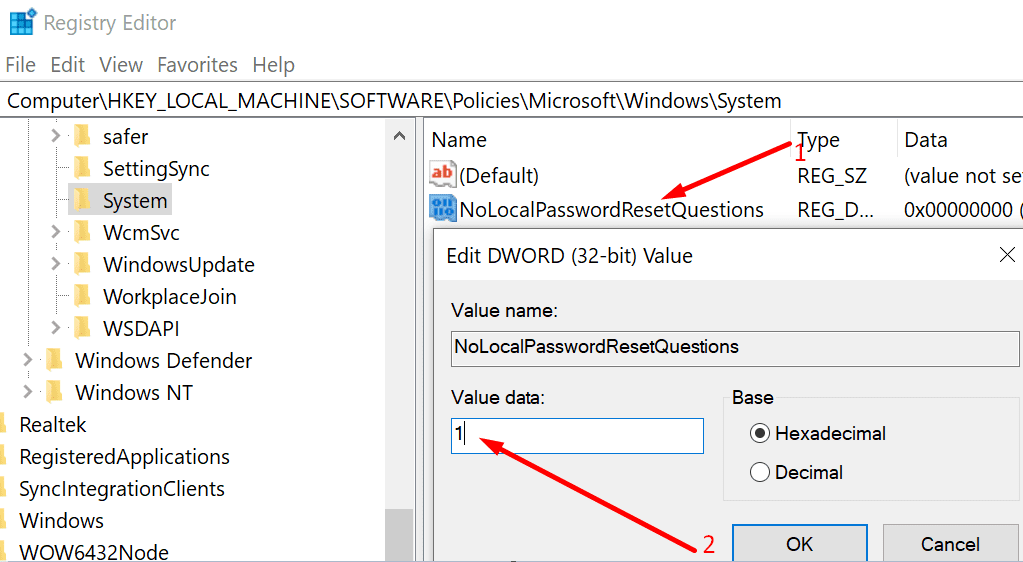
- Name it NoLocalPasswordResetQuestions.
- Then, double-click on the key you just created.
- Go to the Value Data field and type 1 to disable security questions.
- Restart your computer for the changes to take full effect.
If you want to re-enable security questions, you can edit the Value data to 0 (zero) or delete the NoLocalPasswordResetQuestions key.
Disable Security Question Using the Registry Editor.
- Open run command by pressing Windows + R and type Regedit and hit enter to open the registry editor.
Now Navigate to the following path. HKEY_LOCAL_MACHINE\SOFTWARE\Policies\Microsoft\Windows\System
- Now right click on the system folder and create a new Dword 32.
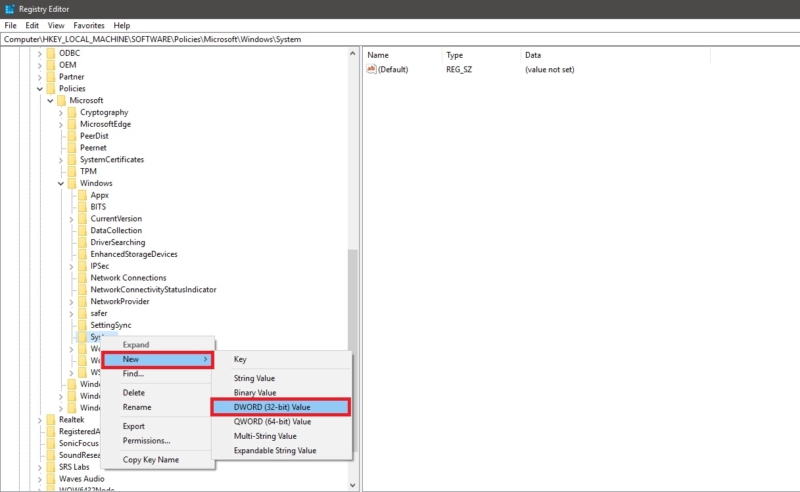
- Set the name of this newly created DWORD as NoLocalPasswordResetQuestions.
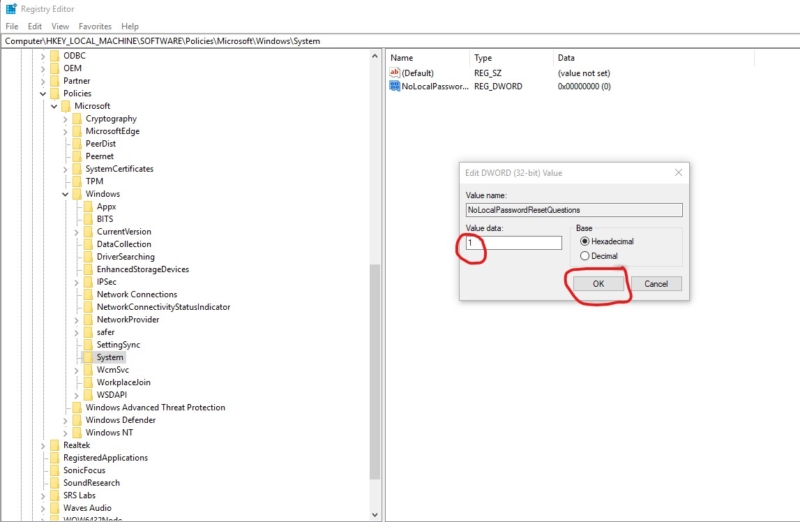
- Now from the right-hand side Right-click on the newly created DWORD and modify the value to 1.
1–>Enable Security Question 0–>Disable security Question
- Click on Ok and close the registry editor and reboot to make the changes.
Disable Security Question Using the Group Policy Editor.
You can Disable or enable Security questions using Group policy Editor, If you are not aware of registry editing you can follow this method.
- Open run command by pressing Windows + R and type gpedit.msc and hit enter to open Group Policy Editor.
Now navigate to the following path. Computer Configuration > Administrative Templates > Windows Components > Credential User Interface
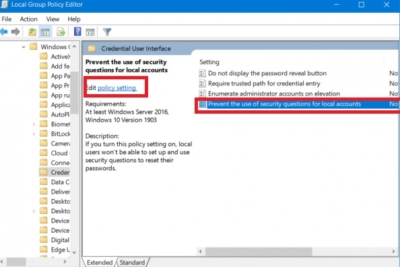
- On the right-hand side panel and Double click on Prevent the use of Security question for Local accounts and enable the policy.
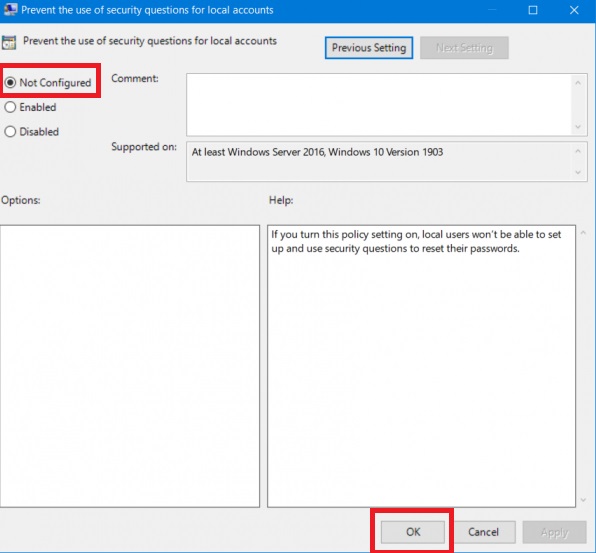
To Disable the Security Question: Enable Prevent the use of Security question for Local accounts
To Enable the Security Question: Click on Not configure.
- Once done click on the exit group Policy editor and restart the PC to make a changes.
Disable Security Question Using Power shell
Using Powershell script is one of the handy tool to disable the security question. Github found a way to disable this feature using update_Allusers. Download the script from Github here. Update-AllUsersQA is a PowerShell script used to change or disable the security questions and answers for local users in a Windows 10 machine.
- First click on Clone or download folder and choose zip download option.
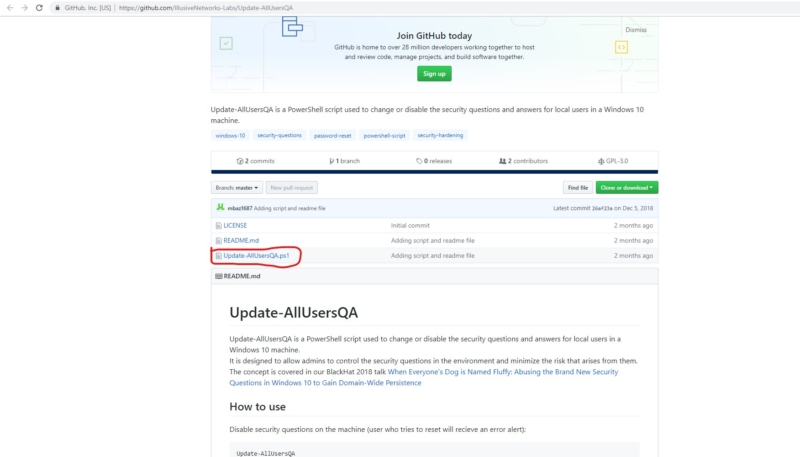
- Extract that zip folder and copy it to C drive for the easy use.
- Open power shell as an admin from the Cortana search.
- Now navigate the PowerShell to the C drive path, Type Cd\ this will change the path to the C drive
- Now again Type cd Update-AllUsersQA-master and hit enter, you are now ready to disable or enable the security question feature.
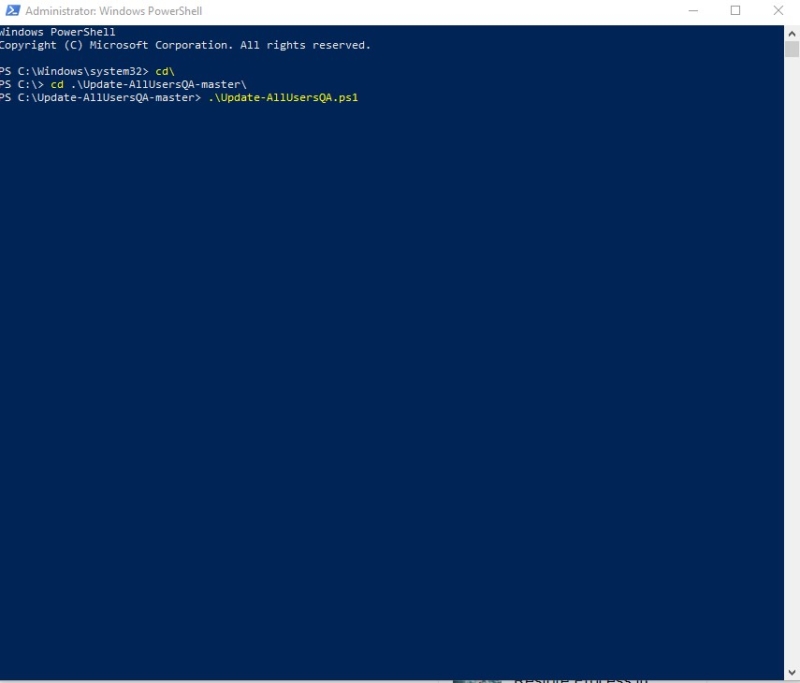
To Disable Security Question: Update-AllUsersQATo
Enable Security question: Update-AllUsersQA -answer SecretAnswer
To enable the security Question this is so simple just add –answer SecretAnswer
Note: If you are running the power shell script for the first time, you have to enable Execution of Scripts is Disabled on this system
While it is always suggested to have the security questions list for the Local user, there are instances when people do not want to answer them. This article educates users about the two methods using which they can disable security questions in Windows 10. We hope that you like the article, do not hesitate to put in your valuable feedbacks in the comments section below.
I am Komal Hatwaani, aims to provide readers with informative and engaging content that covers everything from technology and business to entertainment and lifestyle. This website dedicated to delivering high-quality content that informs, entertains, and inspires our readers.
Join us on our journey as we continue to explore the ever-evolving landscape of news and information, providing you with valuable insights and perspectives that enrich your digital experience.


