If you’re having USB problems on Windows 10 first thing that you should do is to try connecting your device to another USB port to determine if the USB port is working or not.
Steps Wise Methods Fix USB Ports Not Working
Method 1: Check if the device itself is faulty
To check if the USB device is faulty, simply unplug it (‘Eject’ it if it’s a USB storage device) and plug it into another computer. If it works, the device is fine. If it doesn’t, then you’ve isolated the problem! You just need to buy a replacement.
Method 2: Check your power supply (laptop only)
1) Unplug the power supply and charger plug from your laptop
2) Restart your laptop
3) Connect your USB device to the laptop again
4) Plug the power supply back in
Method 3: Check your power management settings
1) Open Device Manager (type “Device Manager” in the Windows search field)
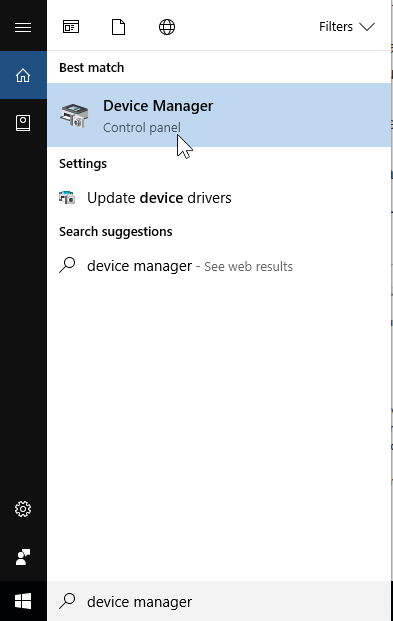
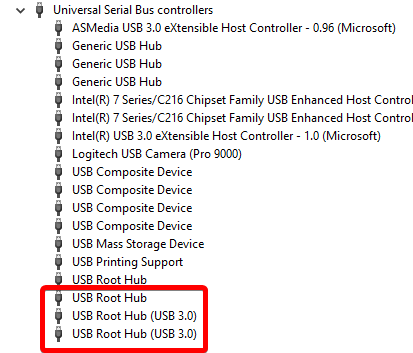
2) Expand the Universal Serial Bus controllers branch
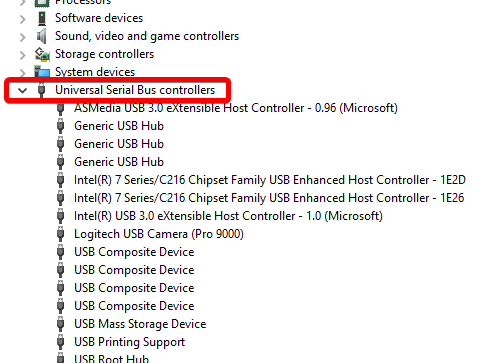
3) Double-click the first USB Root Hub device in the list (if you see only one USB Root Hub device, that’s fine)
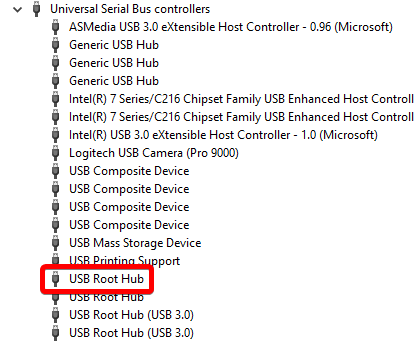
4) Click the Power Management tab
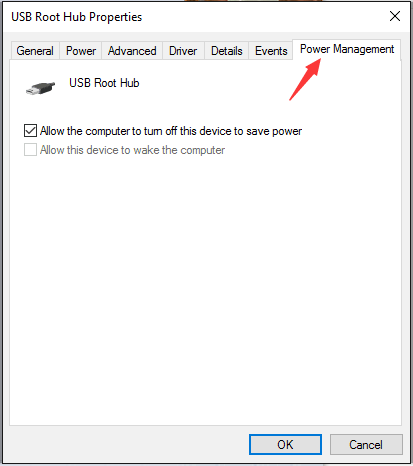
5) Un-check the Allow the computer to turn off this device to save power checkbox, and click OK.
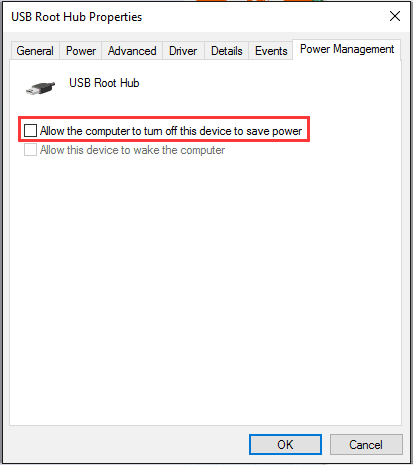
6) Repeat steps 3-5 for each USB Root Hub device in your list of Universal Serial Bus controllers
Method 4: Check your USB device drivers
Step 1. Right-click on the Start menu button and select Device Manager.
Step 2. Expand Universal Bus Controllers. Here, right-click on the USB Root Hub select Update driver.
Step 3. Now click on Search automatically for updated driver software. This will download and install the updated drivers for USB Root Hub on your computer.
Step 4. Repeat the above two steps for remaining USB Root Hub.
Step 5. Restart your computer.
Now, connect the USB device and see if your computer recognizes it or not. If you are still facing trouble connecting your USB device, follow the next method.
Method 5. Turn Off Fast Startup
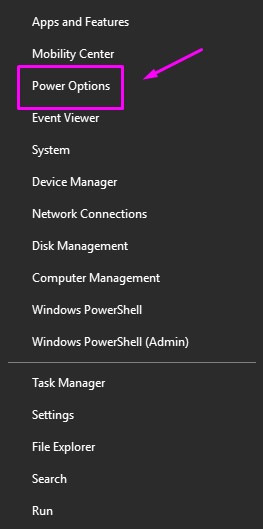
Step 1. Right-click on the Start menu button and select Power Options.
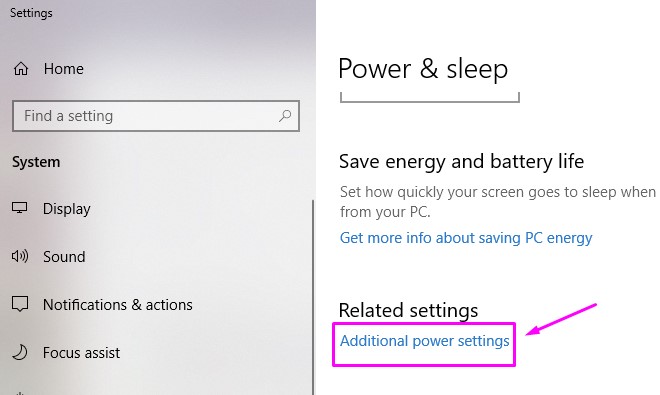
Step 2. Under Related Settings, click on Additional power settings.
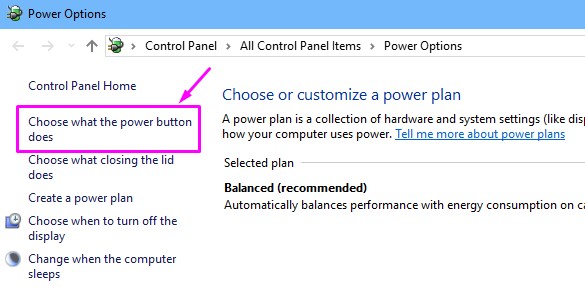
Step 3. On the left side of the window, click on Choose what the power button does.
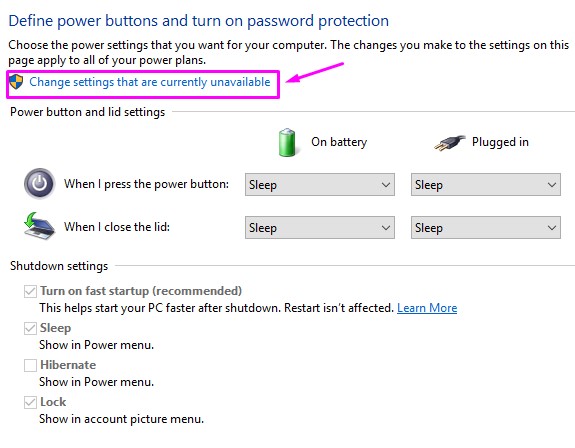
Step 4. Now, select Change settings that are currently unavailable. This will let you change the shutdown settings.
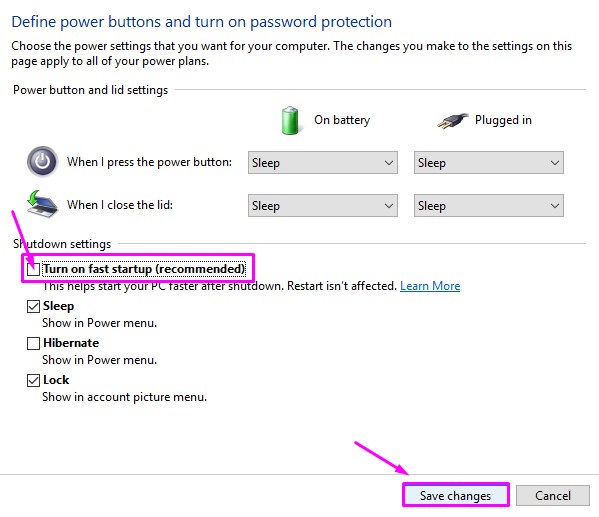
Step 5. Under Shutdown settings, unmark the box beside Turn on fast startup (recommended). And click on Save changes.
Step 6. Restart your computer.
Method 6. Disable USB Selective Suspend Setting
Step 1. Right-click on the Start menu button and select Power Options.

Step 2. Under Related Settings, click on Additional power settings.

Step 3. Now, go to Change plan settings of your selected plan.
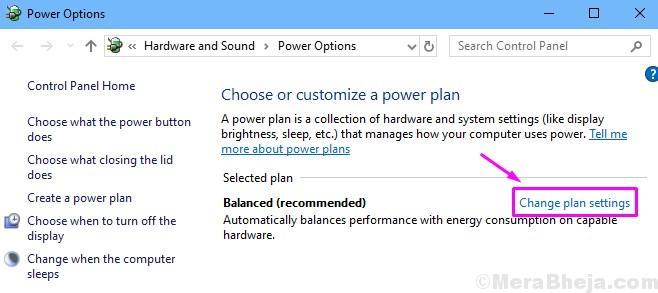
Step 4. Select Change advanced power settings.
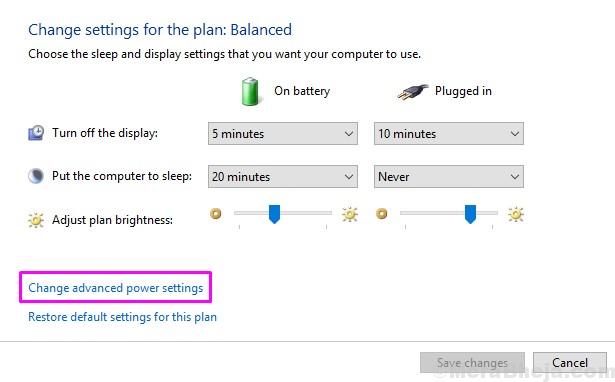
Step 5. Look for USB Settings and expand it. Here, change the USB selective suspend setting to Disabled. Now click on OK.
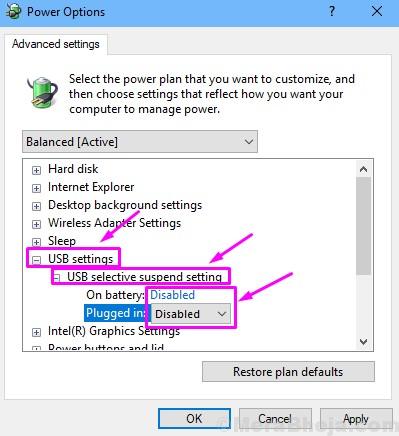
Check if this fixes the problem. If it didn’t, perform the next method.
Method 7. Change Registry
Step 1. Right-click on the Start menu button and select Run.
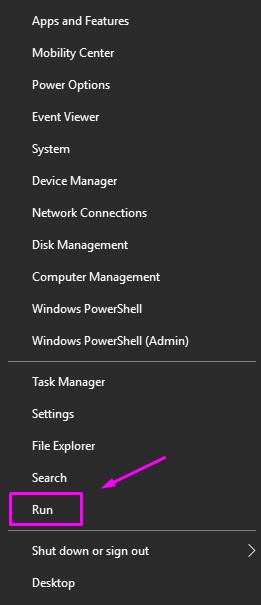
Step 2. Here, type regedit and click on Ok.
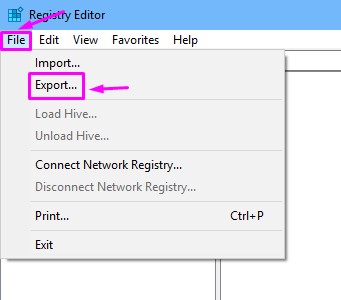
Backup: To perform a backup of the registry, simply go to File drop-down menu and select Export. After that, save the backup file at your desired location. Do select Export Range as All before saving the file.
Step 3. Now, you need to follow the path mentioned below.
HKEY_LOCAL_MACHINE > SYSTEM > CurrentControlSet > Control > Class > {4d36e965-e325-11ce-bfc1-08002be10318}
Step 4. On the right side, look for LowerFilter and UpperFilter. Right-click on them and select Delete. If none of these is available on your computer, then this solution won’t help you. You can skip this method.
Step 5. After deleting them, perform a restart.
After the restart, check if this method has fixed the problem for you or not. If it didn’t help, perform the next method.
Method 8. Troubleshoot the issue
Step 1. Go to Cortana and type Troubleshoot. Select the same from results.
Step 2. Click on Hardware and Devices.
Step 3. The Windows will check for issues. When done, click on Apply Repair Automatically or Apply this Fix, whichever appears.
Step 4. Restart your computer.
This should fix the problem. If troubleshooting didn’t help in fixing the issue, perform the next method.
Method 9. Install Important Updates
Step 1. Right-click on the Start menu button and select Settings.
Step 2. Go to Update & Security.
Step 3. Select Check for updates. If there are any pending updates, download and install them.
Step 4. After installing the updates, restart your computer.
This should fix the issue. And, if even this didn’t help your case, then there is something wrong with the USB device or your USB port. For USB Port, take your computer to the nearest authorized service centre and get it repaired.
We hope we were able to help you fix this problem using our methods.
I am Komal Hatwaani, aims to provide readers with informative and engaging content that covers everything from technology and business to entertainment and lifestyle. This website dedicated to delivering high-quality content that informs, entertains, and inspires our readers.
Join us on our journey as we continue to explore the ever-evolving landscape of news and information, providing you with valuable insights and perspectives that enrich your digital experience.


